Cleaning an electric guitar is something that many guitarists often overlook. It takes time and usually feels like a chore when all you want to do is practice or play the guitar. However, regular guitar cleaning may save you a lot of headaches in the future. It can also make your guitar sound better and play better.
Cleaner strings, along with a cleaner fretboard, can actually make fretting easier. The strings, frets and fretboard come under a lot of direct skin contact. As you may already know, our skin secretes sweat, oils and whatnot. And, along with dust from the environment, a lot of gunk can form on the fretboard and strings.
Besides the impact on playability, cleaning can also keep your guitar’s body and finish in a better condition, increasing the life of the guitar and its components.
In this article, you’ll learn:
- How to properly deep clean and polish your electric guitar.
- How to use household items for cleaning, if that’s all you have.
- How to clean a guitar without removing the strings.
- How to clean different guitar parts, including frets, fretboard, strings, pickup, etc.
- Guitar maintenance tips so that you don’t have to “deep clean” often
WD-40, a common DIY cleaner, is a petroleum-based cleaner and a penetrating oil which is NOT safe for cleaning your guitar. It can destroy the finish of your guitar or the fretboard. WD-40 should only be used on the guitar’s metal parts, such as the bridge, and only when they have been taken off the guitar first. Some people use them to restore old, rusty guitars. For general-purpose cleaning, naphtha is a better and safer option.
How to Clean Your Guitar (Deep Cleaning)
Deep cleaning should be done once or twice a year, or if the guitar is visibly dirty. Also, you want to use guitar polishes sparingly. A gentle wipe-down with a damp cloth is more than enough if done regularly. It can be done when you’re changing the strings to save the extra step of removing and restringing the guitar.
I recommend placing the guitar on a table, preferably over a towel. Also, roll up another smaller towel and put it under the neck to support the guitar. We also recommend washing your hands first before beginning.
Things You’ll Need
- Cleaning cloth 2-4 pieces. Two cotton rags and two microfibers will suffice.
- Lemon oil, such as Dunlop Lemon Oil (optional but recommended)
- Naphtha
- Toothbrush
- WD-40 Electrical Contact Cleaner for cleaning the electrical parts inside the guitar, such as the pots
- Guitar polish such as Dunlop Formula 65 (optional)
- Rubbing alcohol
Removing and Cleaning the Strings
It is best to remove the strings first before we start cleaning. This would make access to the fretboard much, much more effortless. If you see a lot of gunk formation on the fretboard and they look visibly dirty, it is best to complete this step. A properly cleaned fretboard can significantly increase its life.
The strings, once removed, are also straightforward to clean. You can use rubbing alcohol to wipe down the strings. You can also boil the strings in a water bowl for 15 minutes, which works really well to remove all the gunk from the strings. Regularly cleaning your strings will have the most impact on the sound. Cleaned strings sound brighter and feel better since nobody particularly likes the sticky feeling on their fingers and the smell after each playing session.
Cleaning the Fretboard and Frets
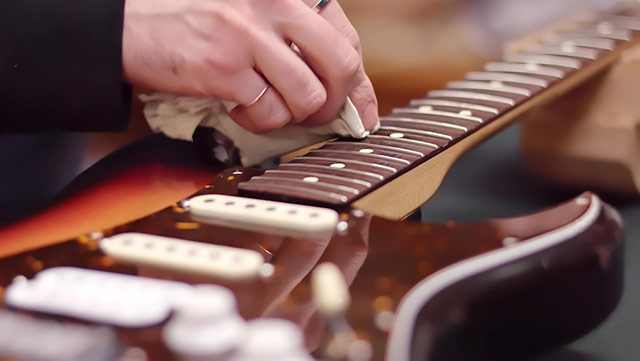
Pour a bit of the naphtha on the cloth and wipe the fretboard in a circular motion. Do not apply the naphtha directly on the fretboard; use only small amounts. Naphtha evaporates quickly without leaving any smudges or marks.
Use a toothbrush to clean the fretboard near the edges of the frets and the frets. You can pour a small amount of naphtha into a small bowl and dip the toothbrush for this. Again, do very light dippings, as you don’t want your fretboard getting flooded with naphtha. After brushing a small area, wipe off the grime with a cloth routinely.
Be extra careful if your fretboard is made of maple wood and lacquered. Some people recommend using steel wool for cleaning, but I don’t, as I feel a toothbrush, naphtha, and a cleaning cloth are enough. Take your time with brushing and wiping. Your guitar is a beautiful instrument; why ruin it by being lazy?
After you’re done with this, you can wipe the fretboard down with a lightly damp cloth. This step is not necessary but is recommended. Then leave the guitar for 15-20 minutes to let any remaining water or naphtha dry off.
Conditioning The Fretboard
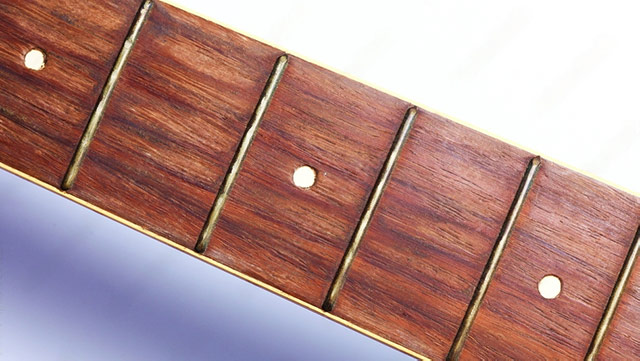
Conditioning, in simple terms, means rehydrating or moisturizing the fretboard, which is critical for long life and better playability. A dry fretboard not only doesn’t feel good, but it might also cause cracks.
Maple Fretboard
If you have a maple fretboard, you wouldn’t need to do any conditioning since they are almost always lacquered. You can use the guitar polish if you want, but it is not necessary.
To do this, spray the polish on a clean and dry cloth and apply it to the fretboard in a circular motion. Then use another part of the cloth to buff it a little. This should make the fretboard surface nice and shiny.
Rosewood, Ebony, Pau Ferro
It is recommended to apply lemon oil in case your fretboard is made of any of these wood. This rehydrates the wood but should only be done a couple of times a year.
Again, start by putting some lemon oil on the cloth and applying it to the fretboard in a circular motion. You can do this gently, and there is no need to put too much pressure. Leave the fretboard to soak up the oil for 15-20 minutes, then wipe with a clean cloth. Remember not to flood the fretboard with the oil since a thin layer (which is later wiped off) is more than enough.
Cleaning the Guitar Body
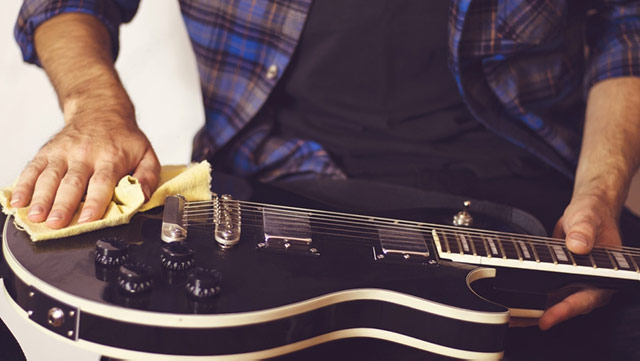
I always first like to wipe down the guitar with a lightly damp cloth, and you want it to be barely damp. You can also use a spray bottle filled with clean water to spray on the cloth. Gently wipe down the whole guitar body, including the back of the neck. Be extra careful around the electronic parts, such as the pickups and the pots. Then use a dry cloth to wipe the moisture off.
After having done this, wait a couple of minutes before using the polish. I am a fan of Dunlop Formula 65, which does its job excellently while still being relatively cheap. Put a couple of sprays worth of polish on a dry cloth and start cleaning the guitar’s body in a circular motion. A soft, clean and preferably microfiber cloth will be the best fit for this job, as you don’t want any dirt to scratch the body.
How to Clean Matte or Satin Finish Guitar Body
Most commercial guitars have a polyurethane finish (with a glossy surface), and you can use polish to clean them. However, if you have a matte-or satin-finish guitar, you should only use a damp cloth for cleaning and no guitar polish.
For a very dirty body with visible finger/hand prints, you can mix naphtha 1:10 with water instead of just water for affected areas. Again, you would only need to do this if you have played the guitar for years without wiping it down properly even once. In most cases, you can just use water with a clean cloth to be safe.
Do not put lemon oil or naphtha on the guitar body. While naphtha is relatively safe for many guitar body types and finishes, you don’t want to take risks. If you don’t have or don’t want to buy a guitar polish, just use a lightly damp cloth for cleaning.
Cleaning the Other Parts of the Guitar
Cleaning the Tuning Machines
Tuning machines or tuners do not need much cleaning. You can wipe the pegs with a clean, damp cloth if they look dirty. You can use a dry toothbrush to remove the dirt from the gears and other parts. For very dirty or rusty tunes, take them out carefully and clean them by dipping them in naphtha or spraying WD-40 on them. Give the pegs a good few turns back and forth so that the liquid can make contact with all of the teeth of the gear.
Only put them back on when they have been properly dried. It is also better to wipe with a clean cloth first to remove any excess cleaning liquid.
Check out this great article on cleaning, reviving and lubricating the tuning machines.
Cleaning the Guitar Bridge
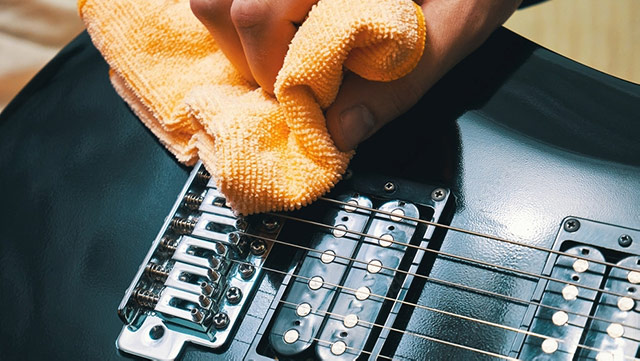
The guitar’s bridge is a vital component of the guitar, and it is also quite delicate in the case of electric guitars with their complex construction. It is best to use a dry toothbrush to clean the bridge and an air blower. You can also use a cotton bud to clean the hard-to-reach areas.
For very dirty bridges, it would be best to take the guitar to a repair shop for cleaning. However, if you’re brave, you can take out the bridge yourself and clean it with a toothbrush dipped in naphtha. After doing this, dry it out for a while and then spray it with the guitar polish. Even though guitar polishes are not meant for metal parts, they wouldn’t harm them. Also, they form a very thin layer that protects the bridge from moisture.
Remember to wipe it as best as you can (you can use another cotton bud) before putting it back on.
Cleaning the Guitar Pickups
For cleaning pickups with visible pole pieces, you can use a dry toothbrush to clean around the pole pieces and a cloth to remove the scraped dirt. While everyday dirt on a pickup won’t affect the guitar’s sound output, it is a good habit to clean them regularly along with the other guitar components. Try to make minimum contact of the brush with the steel surface so as not to make any fine scratches.
If you have previously used steel wool to clean the fretboard, you should consider cleaning the pickups. Steel wool is known to leave tiny steel particles behind that may get attracted to the magnets in the pickups.
For most types of pickups, there is little to be cleaned. Just use a lightly damp cloth to wipe any sweat or oil off and a dry cloth to quickly remove any moisture.
Cleaning the Pots and Switches and Output Jack
Dirty pots with a lot of wear and tear can make them feel scratchy. For the Volume pot, this means the volume would suddenly drop or totally cut at specific positions of the knob, and for the Tone pot, this could mean inconsistent tonal output.
While this usually happens after a long time, many factors, such as humidity and dirt, can accelerate this. As a general rule, you can clean the pots once a year, even if they are working fine. And since we have the strings removed, it is far easier to open the cavity over which the pickguard is screwed.
Start by unscrewing all the screws of the pickguard and keep them in safely. Gently pry open the cavity and take the pickguard off. Do remember the pots are connected to wiring inside. Most guitars would have enough wire length to turn the pickguard over easily.
Now place a small cloth over the cavity and place the pickguard over it (with the inside part facing you). If you look closely, the pots have a small hole around the base. Spray a small amount of WD-40 Contact Cleaner and rotate the knob back and forth for a while. Repeat this process a couple of times for each pot.
Now wait 10 minutes and ensure no excess fluid is flowing from the pots; remove the towel and screw the pickguard back on.
If you’re uncomfortable opening the pickguard and messing with the insides, there is another more straightforward way.
First, place a cloth around the pots and remove the knobs. Now try putting a tiny amount of the contact cleaner fluid on the shaft while turning the pot back and forth. This should drip down cleaner fluid inside the pot, which should do the trick.
To clean the pickup selector switch, place a cloth around it, spray a small amount of the contact cleaner on the shaft, and flip it to different positions. This should clean the insides; however, stay moderate with the cleaning liquid. We don’t want it dripping down inside the cavity of the guitar.
Do the same thing for the output jack. Spray a small amount, insert the amp cable, turn it left and right a few times, then remove it and insert it back a few more times for good measure.
How to Clean Your Guitar with Household Items
You can easily clean the guitar body, strings and fretboard with household items. While this may not work as well on very dirty guitars, it should be good enough for most cases.
What is Safe to Clean a Guitar With
Use water and probably a few drops of dish soap to clean the body, and keep another damp towel to wipe it down with just plain water. If your guitar isn’t particularly dirty, you would want to skip the soap.
For the fretboard, I recommend using warm water and elbow grease. Use a toothbrush and cotton bud to clean the edges of the frets. Credit cards (preferably past their date!) also work very well in scraping the grime off the edges.
If you have naphtha, you can use it to get the dirt and grime off, which is often hard to do with just water.
Do not use any kind of edible oil for the fretboard. Some people suggest using olive oil or coconut oil etc. However, they go rancid, which is not something we want.
The best method for cleaning the strings would be to boil them for 10-15 minutes. You can also put some distilled vinegar in the water if the strings are extra dirty. Remember to run the strings in fresh water after they have come down to room temperature to remove any excess vinegar. And only put the strings back on when they have completely dried.
How to Clean Your Guitar without Removing the Strings
Strings are a hurdle in the way of cleaning the fretboard, frets and even the pickups. This is why you should do a proper cleaning when putting on a new set of strings. You’re removing the strings anyway, and you might as well do the cleaning.
However, if you’re not restringing your guitar and don’t want to remove the strings, you can do the following to clean the strings, frets and fretboard. It should be enough if you follow the guitar maintenance tips provided below and your guitar is not super dirty.
To start cleaning your guitar, put it over a towel on a table and place another rolled towel under the neck to support it.
Take a slightly damp microfiber cloth and put it under the strings, taking it out from the other end of the fretboard. Wipe it back and forth by holding the cloth from both ends and putting downward pressure. You can also use a toothbrush’s opposite end (tip of the handle) to rub the cloth on the fretboard. Do it slowly and gently for the entire length of the fretboard.
For the strings, take a clean microfiber cloth (other cloths might leave lint which may get stuck in the strings’ winding), dip it in warm water, and wring out the excess. Slip the corner of the cloth under a single string from one side and take it out the other, now, pinch it with your fingers and slowly slide it up and down the entire length of the string a few times. Loosening the strings from the tuners would help immensely.
If the string is very dirty, repeat the process with another (cleaner) side of the cloth. You’ll have to do this for each string, and while it wouldn’t clean it as well as boiling them, it is enough for most people’s needs.
You can clean the guitar’s body as described in the other sections.
Guitar Maintenance Tips
Cleaning a guitar is no easy job while necessary sometimes, a lot of the buildup of dirt, grime and sludge can be reduced by taking regular care of the guitar and following basic practices. This will not only keep your guitar looking new but also increase its life.
- Wash your hands before playing
- Wipe the strings after every playing or practice session with a clean and dry microfiber cloth. This will increase their life and keep them in a better playing condition.
- Wipe the body every couple of days with a clean cloth. You can use a slightly damp cloth once in a while. For metal parts, stick to using a dry cloth. It is enough if done regularly.
- Put the guitar back in its case if you’re not going to play it for a few days.
- If you are not going to be playing the guitar for an extended period (for example, if you have multiple guitars), make sure to remove the strap before putting it in the case. Prolonged contact of the lacquered surface with plastics can damage it.


